
Table of Contents
Table of Contents
Have you ever stood in your kitchen, a handful of vegetable peels or a used coffee filter in your hand, and felt that familiar pang of guilt as you tossed it into the trash? You know that bag is headed straight for the landfill, but what if there was a better way? What if I told you that you’re not holding waste at all—you’re holding the very foundation of your garden’s future. Those scraps are the secret to richer soil, healthier plants, and a lighter environmental footprint. In fact, they’re the raw ingredients for what gardeners lovingly call “black gold.” The truth is simple: when you Turn Your Scraps into Soil Gold, you unlock a cycle of renewal that benefits both your home and the planet.
Welcome to the wonderful, wiggly, and deeply satisfying world of DIY composting. Forget the idea that this is some complicated science experiment reserved for experts with sprawling gardens. Composting is a natural process you can easily harness in a corner of your balcony, backyard, or even under your kitchen sink. This guide is your friendly, step-by-step manual to help you Turn Your Scraps into Soil Gold—transforming everyday kitchen waste into the most powerful, nutrient-rich plant food on earth (For more soil enrichment strategies, see our Make Leaf Mold Fast Guide). So, let’s roll up our sleeves, dig in, and discover how your leftovers can become the lifeblood of your garden.
For official composting basics, see the US EPA’s Composting at Home guide.
Introduction: Turn Your Scraps into Soil Gold
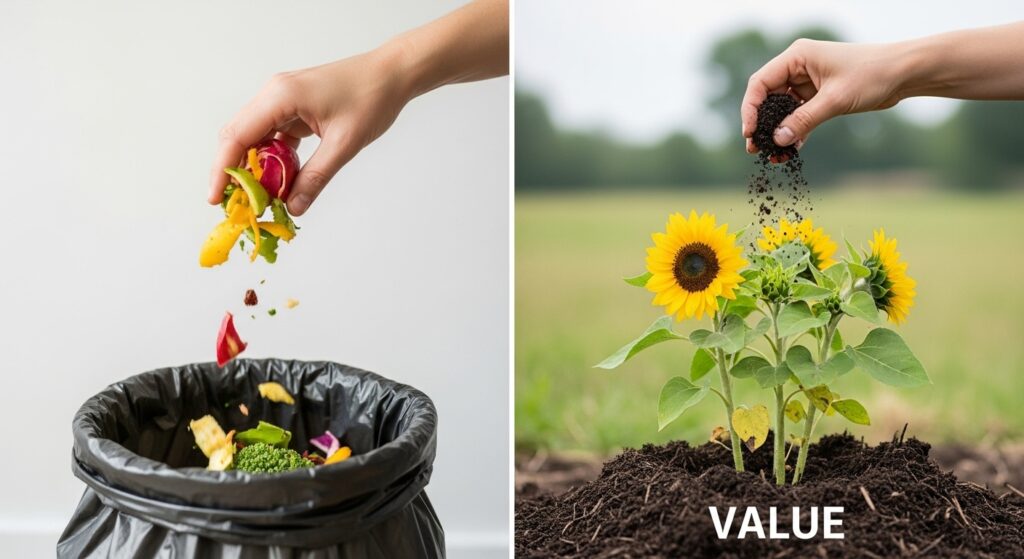
For centuries, gardeners have embraced a simple truth: what comes from the earth can—and should—return to it. Choosing to Turn Your Scraps into Soil Gold through home composting is the ultimate act of ecological reciprocity. It’s a small, tangible way to break free from the wasteful “take-make-dispose” cycle and step into a regenerative loop that begins right in your own kitchen or backyard.
The impact is profound, both for your little patch of earth and for the planet as a whole. Each year, mountains of organic waste—food scraps, yard trimmings, and more—are buried in landfills. There, deprived of oxygen, they break down anaerobically, releasing methane, a greenhouse gas far more potent than carbon dioxide. By choosing to Turn Your Scraps into Soil Gold, you’re not only cutting your household trash by up to 30%, but you’re also actively preventing the creation of this harmful gas and contributing to climate resilience.
And the magic doesn’t stop with waste reduction. For your plants, compost is nothing short of a miracle elixir. It’s not just a fertilizer—it’s a complete soil amendment. Compost improves soil structure, allowing heavy clay to drain more freely and sandy soil to hold onto precious moisture. It teems with beneficial microbes and fungi that create a thriving underground ecosystem, helping plant roots absorb nutrients more efficiently and resist disease. Best of all, it’s a slow-release, all-natural food source that nourishes without burning delicate roots the way synthetic fertilizers can. In short, when you Turn Your Scraps into Soil Gold, you bring your soil—and your garden—to life.
What is Composting, Really? (It’s Alive!)
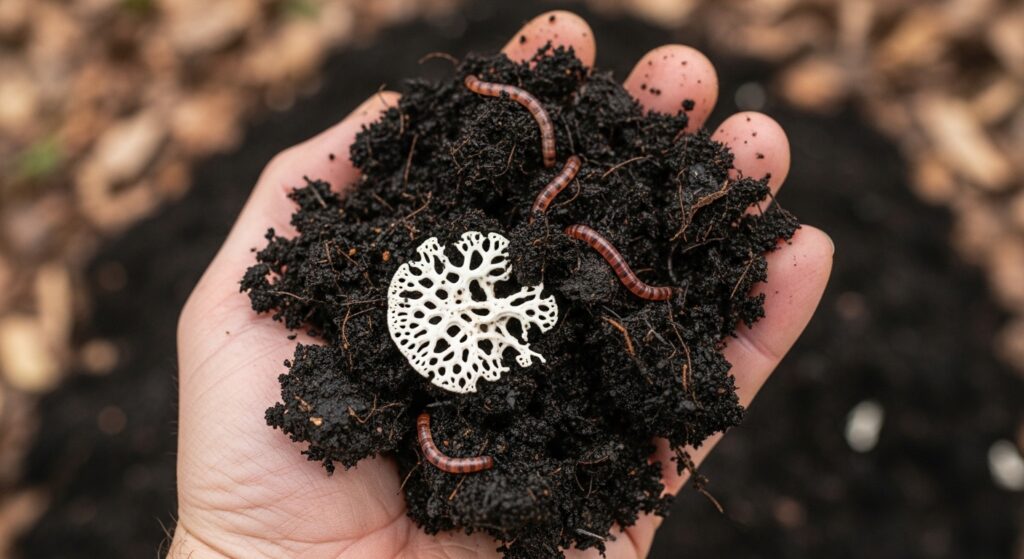
At its core, composting is the art of helping nature speed up its own recycling system. In a forest, fallen leaves, dead trees, and animal droppings don’t get bagged up for disposal—they’re broken down slowly by a hidden army of decomposers: bacteria, fungi, insects, and worms. The result is a rich, dark, crumbly humus that nourishes the entire ecosystem. When you choose to Turn Your Scraps into Soil Gold, you’re tapping into this same ancient process, but in a way that fits neatly into modern life.
When you make kitchen waste compost at home, you become the manager of a miniature, hyper-efficient forest floor. By setting up a simple compost bin, you create the perfect environment for those decomposers to thrive. All they need is a balanced diet of food scraps and yard trimmings, the right amount of air and water, and a little patience. In return, they work tirelessly, generating heat as they metabolize, transforming what you once called “waste” into a powerful soil amendment that enriches your garden.
Composting is a living, breathing process. Place your hand inside a healthy pile, and you’ll feel warmth—the sign of millions of microbes hard at work. This controlled, aerobic decomposition is what makes composting different from the smelly, anaerobic rot that happens in landfills. By choosing to Turn Your Scraps into Soil Gold, you’re not just recycling—you’re creating life beneath your feet.
👉 For more resilient planting inspiration, check our fast-growing winter cover crops guide.
The Bounty of Benefits: Why You’ll Never Look at a Banana Peel the Same Way Again
The reasons to start composting kitchen waste are as layered and rewarding as a well-built compost pile. When you choose to Turn Your Scraps into Soil Gold, you unlock a cascade of benefits that touch your home, your garden, and the planet.
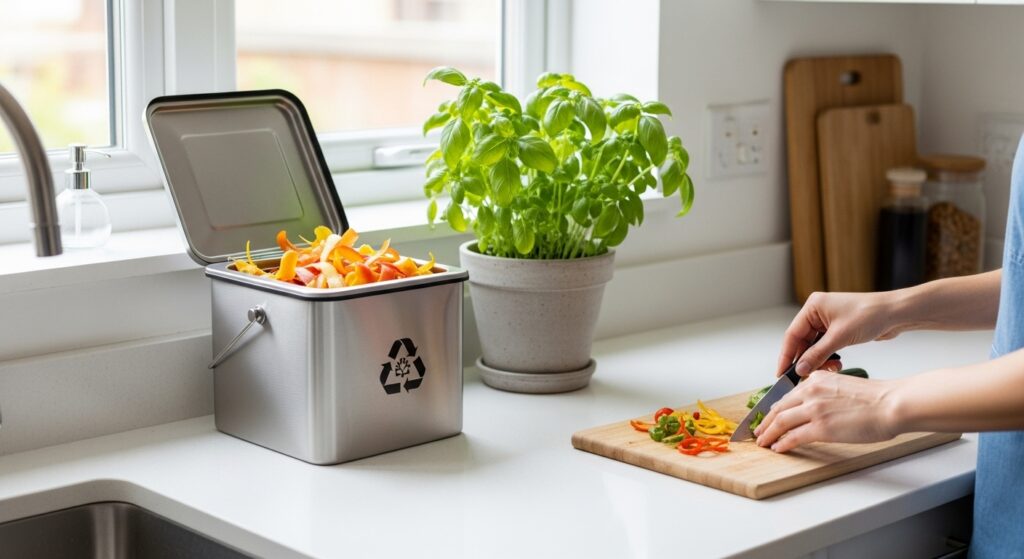
- Waste Not, Want Not: The most immediate impact is the dramatic reduction in household trash. Your kitchen bin smells fresher without rotting food scraps, and you’ll find yourself taking the trash out far less often.
- Save Money, Skip the Store: Bagged compost and commercial soil amendments can be costly. By making your own in a simple compost bin, you eliminate that expense entirely, creating a premium garden product for free from resources you already have.
- Supercharge Your Soil: This is the gardener’s ultimate prize. Compost improves soil tilth, making it easier to work and better for root growth. It acts like a sponge, holding water and reducing irrigation needs. It also suppresses plant diseases and pests by fostering a thriving, competitive soil biology.
- The Ultimate Eco-Friendly Act: Composting is a direct way to reduce landfill mass, cut methane emissions, and close the nutrient loop (For additional indoor eco-hacks, see our low-maintenance indoor gardening guide). By practicing organic recycling, you also reduce reliance on chemical fertilizers, which require significant energy to produce and often pollute waterways.
Choosing Your Champion: Finding the Right Composting Method
One of the beauties of composting is its flexibility. There’s a method to fit every lifestyle, space, and comfort level. Let’s explore the most popular ways to make compost at home.
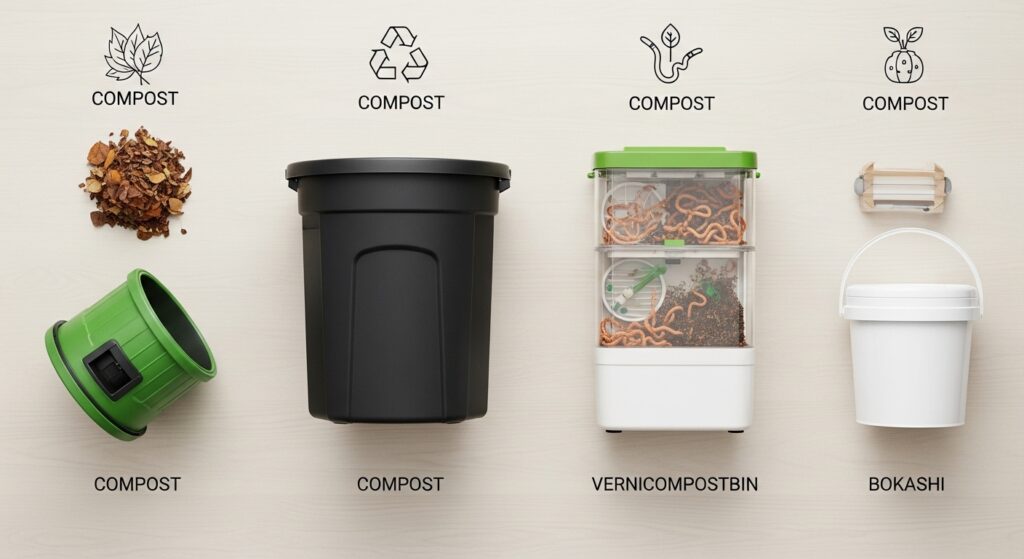
1. The Compost Pile: The Classic Method
- What it is: A free-standing heap in a corner of your yard.
- Best for: Gardeners with ample outdoor space and plenty of yard waste.
- Pros: Free to start, easy to turn with a pitchfork, and can handle large volumes.
- Cons: Slower process, may attract pests if unmanaged, not visually appealing to some.
2. The Compost Bin: The Contained Workhorse
- What it is: An enclosed container, often plastic or wood, with lids and doors for easy access.
- Best for: Homeowners with small- to medium-sized yards who want tidy, efficient composting.
- Pros: Neat appearance, retains heat and moisture, deters pests, widely available.
- Cons: Can be more expensive, turning is slightly less convenient than a free pile.
3. The Tumbler: The Speed Demon
- What it is: A barrel-shaped container on a frame, rotated by a crank for aeration.
- Best for: Those seeking fast results with minimal effort and smaller amounts of waste.
- Pros: Easy to turn, rapid decomposition (compost in weeks), excellent pest control.
- Cons: Higher cost, limited capacity, harder to turn when full, requires balanced inputs.
4. Vermicomposting: The Underground Army
- What it is: Using red wigglers to break down food scraps in a contained bin, producing compost and nutrient-rich “worm tea.”
- Best for: Apartments, condos, classrooms, or homes without outdoor space.
- Pros: Year-round indoor composting, fast and efficient, fun and educational for kids.
- Cons: Worms need specific care (temperature, moisture), limited capacity, and some foods are unsuitable.
5. The Bokashi Method: The Fermenter
- What it is: An anaerobic process that ferments kitchen waste—including meat and dairy—in an airtight bucket with inoculated bran.
- Best for: Those who want to compost all food waste quickly and can bury the pre-compost in soil.
- Pros: Very fast (about 2 weeks), handles all scraps, odor-free fermentation, suitable for indoors.
- Cons: Requires purchasing Bokashi bran, produces pre-compost that must be buried, and involves a two-step process.
For most beginners with a yard, a simple home compost bin is the perfect way to start turning kitchen waste into a powerful soil amendment. For those without outdoor space, vermicomposting offers a fantastic and efficient alternative to Turn Your Scraps into Soil Gold indoors.
The Golden Rules: What to Feed the Beast
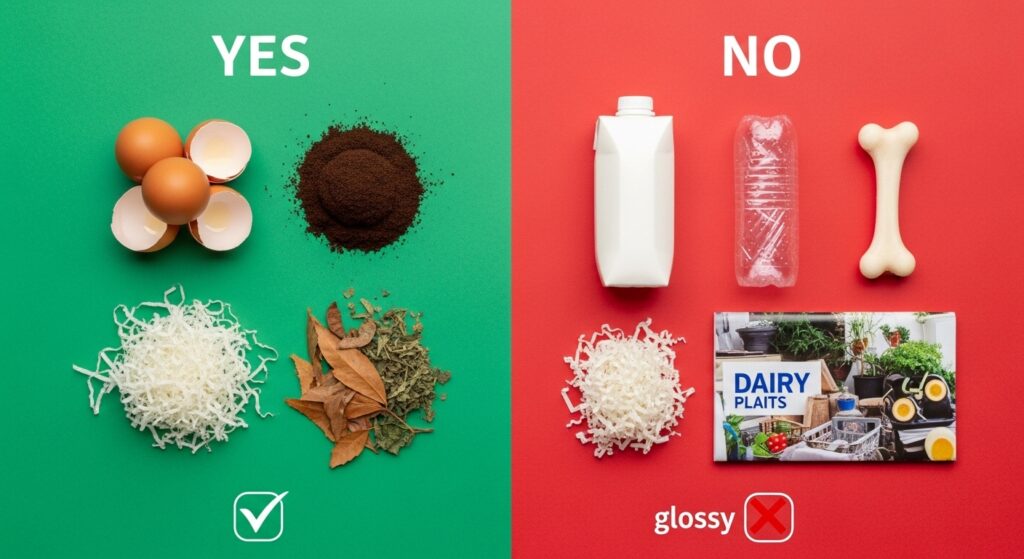
A thriving compost pile is all about balance. To truly Turn Your Scraps into Soil Gold, your decomposer workforce needs a carefully managed diet of two main material types: “Greens” and “Browns.”
- Greens (Nitrogen-Rich Materials): These provide protein for microbes and are typically moist and colorful.
- Yes! Fruit and vegetable scraps, coffee grounds and filters, tea leaves, paper bags, fresh grass clippings (spread thinly to avoid matting), plant trimmings, and manure from herbivores such as cows, horses, rabbits, or chickens.
- Browns (Carbon-Rich Materials): These supply energy in the form of carbohydrates and are usually dry and brown.
- Yes! Dry leaves, straw or hay, wood chips and sawdust (from untreated wood), shredded cardboard (non-glossy, tape removed), shredded newspaper (black-and-white ink only), egg cartons, and dried pine needles.
A good rule of thumb is to aim for a ratio of about 2–3 parts Browns to 1 part Greens by volume. Too many Greens will leave your pile slimy and smelly, while too many Browns will slow decomposition to a crawl. Striking the right balance ensures your compost bin becomes a powerhouse of organic recycling that steadily transforms waste into a nutrient-rich soil amendment.
The “Do Not Compost” List
Not everything belongs in your compost pile. Some items attract pests, create foul odors, or introduce harmful pathogens and chemicals. To successfully Turn Your Scraps into Soil Gold, avoid adding:
- Meat, fish, and bones: Attract rodents and produce unpleasant smells.
- Dairy products (butter, milk, yogurt, cheese): Invite pests and odors.
- Fats, oils, and grease: Coat materials, block airflow, and attract pests.
- Diseased or insect-ridden plants: Pathogens may survive and spread back into your garden.
- Pet waste (dog, cat, bird): Can contain harmful parasites and pathogens.
- Glossy or coated paper: Contains plastics and chemicals.
- Coal or charcoal ash: May include sulfur and other substances harmful to plants.
- Chemically treated wood products: Risk of introducing toxins into your compost.
By following these golden rules, you ensure your compost pile remains healthy, efficient, and safe—helping you consistently Turn Your Scraps into Soil Gold for a thriving garden.
Step-by-Step Guide to Building a Thriving Compost Pile
Ready to begin? Here’s a simple, practical walkthrough for building and maintaining a thriving compost pile or compost bin. With a little care, you’ll transform everyday kitchen waste into a nutrient-rich soil amendment that truly helps you Turn Your Scraps into Soil Gold.
Step 1: Find the Perfect Spot Choose a level, well-draining area in your yard that’s accessible year-round. Partial shade works best—too much sun dries the pile out, while full shade can keep it damp and cold.
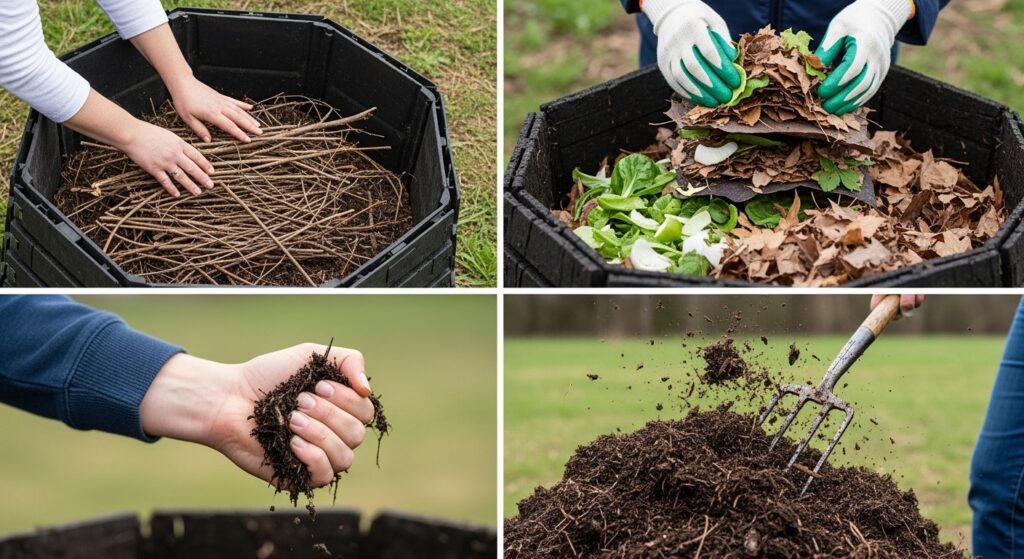
Step 2: Start with a Foundation Build your pile directly on the soil. This allows worms and beneficial organisms to migrate naturally and improves drainage. For extra airflow, place a layer of coarse brush or twigs at the bottom.
Step 3: The Art of Layering (Lasagna for the Soil) Think of your compost like soil lasagna—alternating layers of Greens and Browns.
- Begin with a fluffy 4–6 inch layer of Browns (fallen leaves, shredded cardboard).
- Add a 2–3 inch layer of Greens (kitchen scraps, coffee grounds, fresh clippings).
- Sprinkle a thin layer of finished compost or garden soil to inoculate microbes.
- Lightly moisten until the pile feels like a wrung-out sponge. Repeat the cycle—Brown, Green, soil, moisture—until your pile reaches 3–4 feet high. This size helps retain heat and speeds decomposition.
Step 4: Maintain the Momentum A compost pile is alive and needs care.
- Turning: Every week or two, use a pitchfork or aerator to mix. This adds oxygen, redistributes heat, and accelerates breakdown. If you’re using a tumbler, just crank it every few days.
- Moisture Check: Test with your hand. If dry and dusty, add water. If soggy and smelly, add more Browns (like shredded newspaper) and turn to improve airflow.
Step 5: Patience is a Virtue Depending on your method and how actively you manage it, compost can take anywhere from two months to a year to mature. With consistency, you’ll watch your pile transform into rich, dark compost—proof that you can Turn Your Scraps into Soil Gold (For more DIY construction inspiration, check our DIY cold frame budget plans) with nothing more than patience and care.. A well-tended, hot pile will be fastest. A slower, cold pile still works—it just takes more time.
Troubleshooting: Reading Your Pile’s Signals
Your compost pile is a living system, and it will give you signals about its health. Learning to read these clues ensures you can keep the process on track and consistently Turn Your Scraps into Soil Gold.
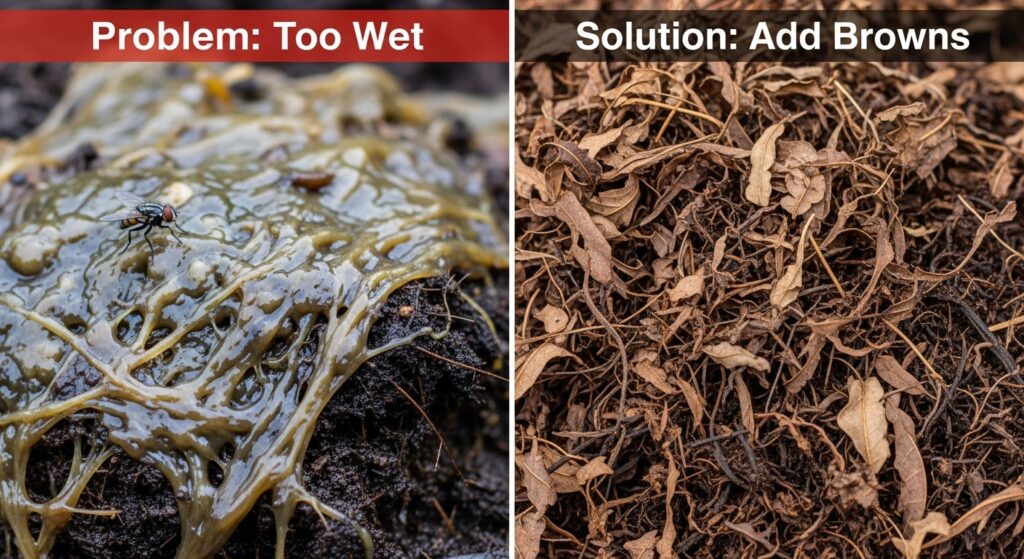
- Problem: It smells foul, like rotten eggs
- Diagnosis: The pile is too wet and lacking oxygen, leading to anaerobic conditions.
- Cure: Turn the pile immediately to introduce air. Mix in plenty of dry Browns such as straw or shredded paper to absorb excess moisture and restore balance.
- Problem: It’s not breaking down—it just sits there
- Diagnosis: The pile may be too dry, missing enough Greens (nitrogen), or lacking airflow.
- Cure: Moisten the pile while turning it. Add fresh Greens like grass clippings or vegetable scraps to jumpstart microbial activity. Increase turning frequency to keep oxygen flowing.
- Problem: It’s attracting flies and pests
- Diagnosis: Food scraps are too close to the surface.
- Cure: Always bury new kitchen waste under a 6-inch layer of Browns or finished compost. Using a secure lid on your compost bin also helps deter pests.
- Problem: The pile is warm in the middle, but nowhere else
- Diagnosis: This is normal—the core is always the most active. Alternatively, the pile may be too small to generate consistent heat.
- Cure: Ensure your pile is at least 3 feet wide and tall. When turning, move outer materials into the center to keep decomposition even.
By paying attention to these signals, you’ll keep your compost pile thriving and ensure every bit of kitchen waste compost transforms into a nutrient-rich soil amendment. Troubleshooting is simply part of the journey to reliably Turn Your Scraps into Soil Gold.
👉 For frost safety tips, see our frost protection for plants DIY guide.
The Grand Finale: How to Know When Your Compost is Ready
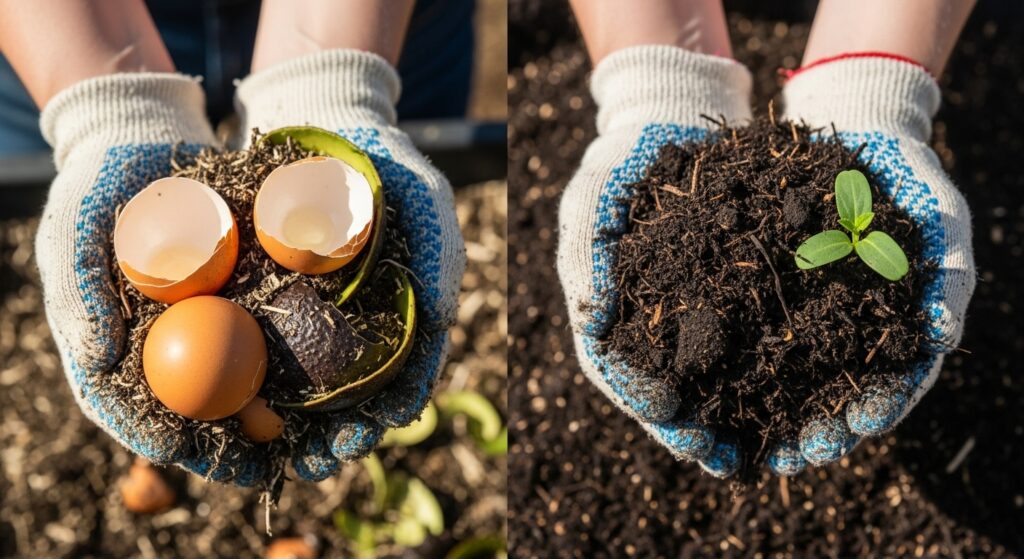
After months of care and attention, your compost pile is finally ready to reward you. But how do you know when it’s time to harvest and truly Turn Your Scraps into Soil Gold?
- It looks like soil: The finished product should be dark, crumbly, and smooth in texture—like rich garden earth. You shouldn’t be able to recognize the original kitchen waste materials, except for a few stubborn twigs or eggshells, which can easily be sifted out.
- It smells like a forest: A healthy batch of compost carries a fresh, sweet, earthy aroma. It should smell pleasant and natural, never sour or rotten.
- It’s cool to the touch: Once microbial activity slows down, the pile stops generating heat. This cooling signals that your compost has matured into a stable soil amendment.
Even if your compost looks finished, it’s wise to let it “cure” for a few extra weeks. This final stage allows decomposition to fully stabilize, ensuring your compost bin produces nutrient-rich material that’s safe and effective for your plants. With patience, you’ll see how simple it is to Turn Your Scraps into Soil Gold and close the loop of organic recycling in your own backyards, the nutrients, making it even better for your plants. You can sift it through a mesh screen to remove any large chunks, which can be thrown back into your new pile to continue breaking down.
The Grand Finale: How to Know When Compost is Ready
This is the most rewarding stage—seeing how your finished compost can transform your garden. When you Turn Your Scraps into Soil Gold, you create a versatile resource that enriches plants in multiple ways.
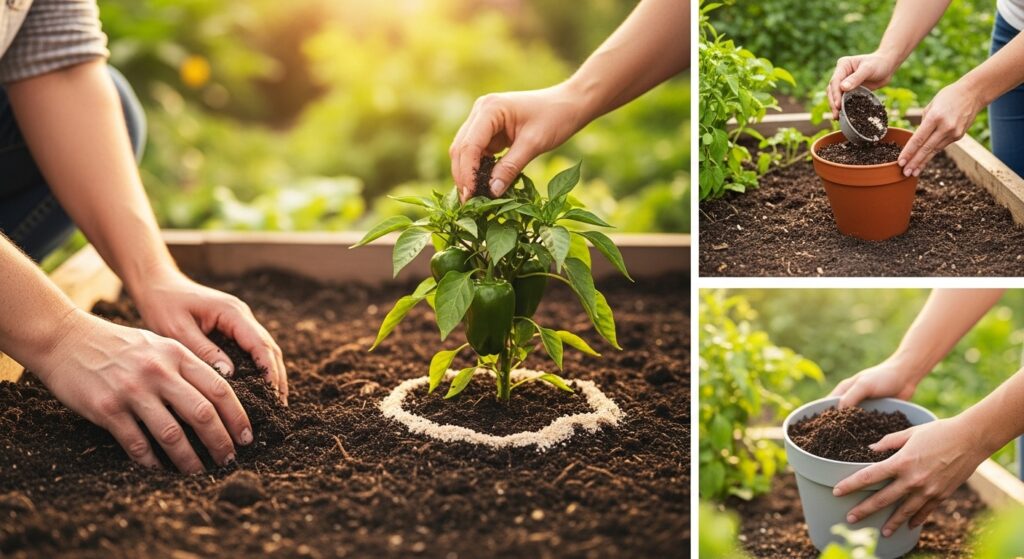
- Soil Amendment: Before planting a new bed or at the start of spring, work a 2–3 inch layer of compost into the top 6 inches of soil. This boosts vegetable gardens, annual flower beds, and fruit trees by improving structure, moisture retention, and fertility.
- Top-Dressing: Apply a thin layer (½–1 inch) of compost around the base of established plants, shrubs, and trees. Lightly scratch it into the soil surface. As you water, nutrients seep down to feed the roots gradually.
- Potting Mix: Craft your own nutrient-rich potting blend by mixing one part compost with one part perlite or vermiculite and one part coconut coir or peat moss. Seedlings and houseplants thrive in this balanced medium.
- Compost Tea: Steep a shovel-full of compost in a bucket of water for 24–48 hours. Strain the liquid and use it as a powerful, natural fertilizer to give plants a quick nutrient boost.
By putting your finished kitchen waste compost to work, you close the loop of organic recycling and ensure your garden flourishes with sustainable nourishment. Every handful is proof that you can Turn Your Scraps into Soil Gold and feed life back into the earth.
Creative & DIY Compost Bin Ideas: Putting Your Soil Gold to Work in the Garden
You don’t need fancy equipment or expensive bins to start composting. With a little creativity, you can build a perfect home compost bin at minimal cost and begin to Turn Your Scraps into Soil Gold right in your backyard.
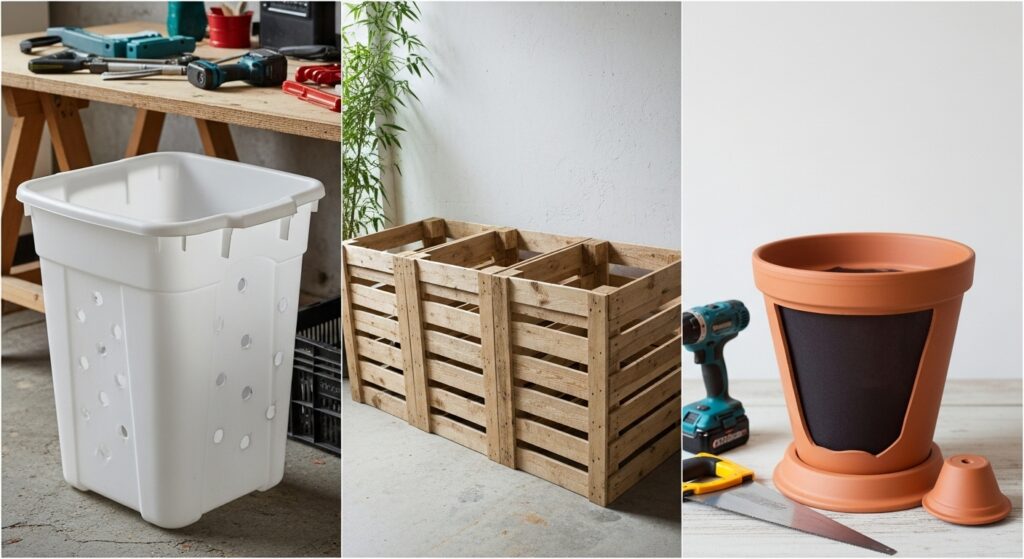
- The Pallet Bin: Gather four wooden pallets (look for HT markings for Heat-Treated, never MB for Methyl Bromide). Stand them upright to form a square and secure the corners with wire or screws. This setup is sturdy, offers excellent airflow, and is often free to source.
- The Trash Can Converter: Repurpose a plastic or metal trash can with a lid. Drill multiple holes across the sides, bottom, and lid for aeration. Place it on bricks for drainage, and you’ll have a mobile, contained composter that’s perfect for kitchen waste compost.
- The Wire Mesh Bin: Use hardware cloth or sturdy wire mesh to form a circle, fastening the ends with wire or zip ties. This simple, effective, and inexpensive option is easy to assemble and dismantle, making it ideal for beginners.
- The Wood and Wire Three-Bay System: For dedicated composters, build a three-section bin from wood and wire. One bay holds fresh scraps, another is actively decomposing, and the third cures finished compost. This system ensures a continuous supply of nutrient-rich soil amendment for your garden.
By building one of these DIY systems, you’ll not only save money but also embrace organic recycling at home. Each design helps you reliably Turn Your Scraps into Soil Gold, creating a sustainable cycle that nourishes your plants and reduces waste.
Conclusion: Your Journey to Turn Your Scraps into Soil Gold Starts Today

Composting is more than just a gardening technique—it’s a mindset. It’s about recognizing potential where others see waste and embracing the ancient, beautiful cycle of growth, decay, and rebirth. When you choose to Turn Your Scraps into Soil Gold, you connect deeply with your food, your garden, and the planet in a profoundly tangible way.
Perfection isn’t required. Your pile may smell or break down slowly at first, and that’s perfectly normal. Every experienced composter has faced those challenges. The microbes are forgiving, and the process of organic recycling is remarkably resilient.
So, the next time you’re in the kitchen about to toss apple cores or coffee grounds, pause. See them not as trash, but as the first layer of your own soil lasagna—the foundation of thriving plants and a healthier earth. Whether it’s tomatoes in your vegetable bed, roses in bloom, or fruit trees nourished by your homemade soil amendment, the rewards are endless. Start small, start today, and join the quiet revolution to Turn Your Scraps into Soil Gold.
👉 For more resilient orchard protection, check our fruit tree winter guards and DIY repellents guide.
Happy composting!
FAQ: Turn Your Scraps into Soil Gold
1. What does “Turn Your Scraps into Soil Gold” mean?
It’s the process of transforming everyday kitchen waste compost—like fruit peels, coffee grounds, and yard trimmings—into nutrient-rich compost. This “soil gold” acts as a natural soil amendment that improves fertility, structure, and water retention while reducing landfill waste.
2. Do I need a compost bin to start?
Not necessarily. You can begin with a simple pile in your backyard. However, a compost bin helps keep things tidy, retains heat and moisture, and deters pests, making the process of organic recycling more efficient.
3. How long does it take to Turn Your Scraps into Soil Gold?
Depending on your method and how actively you manage the pile, compost can take anywhere from 2 months to a year. Tumblers and vermicomposting systems often produce results faster.
4. What materials should I add to my compost pile?
Balance is key. Add:
– Greens (Nitrogen-rich): Vegetable scraps, coffee grounds, grass clippings, herbivore manure.
– Browns (Carbon-rich): Dry leaves, straw, untreated wood chips, shredded cardboard, newspaper.
5. What should I avoid putting in my compost bin?
Never add meat, dairy, oils, pet waste, glossy paper, or chemically treated wood. These can attract pests, create odors, or introduce harmful pathogens.
6. How do I know when my compost is ready?
Finished compost looks dark and crumbly, smells earthy like a forest, and feels cool to the touch. At this stage, it’s safe to use as a soil amendment in your garden.
7. How can I use compost in my garden?
You can:
– Mix it into the soil before planting as a soil amendment.
– Apply it as a top dressing around established plants.
– Blend it into potting mixes for seedlings and houseplants.
– Brew compost tea for a quick liquid fertilizer boost.
8. Is composting really eco-friendly?
Yes! By choosing to Turn Your Scraps into Soil Gold, you reduce landfill mass, cut methane emissions, and close the nutrient loop. It’s one of the simplest and most impactful acts of organic recycling you can do at home.
")
")

10 Comments on “Turn Your Scraps into Soil Gold: A Complete Guide to Composting at Home”