")
Table of Contents
Table of Contents
Introduction: Why Leaf Mold Deserves a Place in Every Garden
Every autumn, gardeners face the same dilemma: mountains of fallen leaves. Most people bag them up for disposal, some toss them into a slow compost pile, and a few simply let them rot in a forgotten corner. But what if I told you those leaves could become a gardener’s secret weapon — and not in a year, but in just 6–8 weeks?
That’s the magic of leaf mold. It’s not compost, it’s not mulch, and it’s not waste. It’s a fungal-rich soil conditioner that can transform the way your garden holds water, breathes, and supports life. And here’s the twist: while most guides tell you to wait a year, I’ll show you a fast leaf mold method that works in a single season.
When you learn to make leaf mold this way, you’re not just speeding up a process — you’re reclaiming control over your garden’s resources. Instead of relying on store-bought conditioners, you’re producing a natural amendment that’s perfectly suited to your soil.”
This sense of independence is one of the reasons seasoned gardeners return to leaf mold year after year.
Another benefit is the rhythm it creates in your gardening calendar. Autumn becomes the season of preparation, where you gather and process leaves, knowing that by spring you’ll have a rich, earthy material ready to use. It transforms what many see as “yard waste” into a cornerstone of soil health.
What Exactly is Leaf Mold? (And Why Gardeners Whisper About It)
Leaf mold is the product of fungal decomposition of leaves. Unlike compost, which is driven by bacteria and rich in nutrients, leaf mold is primarily fungal-driven and carbon-based. Think of it as the “forest floor effect” — that dark, crumbly layer you see when you brush aside leaves in a woodland.
Here’s why experienced gardeners swear by it:
- It holds up to 500% of its weight in water, making it a lifesaver in drought-prone gardens. Royal Horticultural Society on Leaf Mold.
- It loosens clay soils and binds sandy soils, balancing extremes.
- It feeds soil fungi, which in turn form symbiotic relationships with plant roots.
Curiosity twist: Many gardeners discover leaf mold by accident — they find a forgotten pile of leaves a year later, dark and crumbly, and realize they’ve struck gold. But why wait a year when you can engineer the process?
When you make leaf mold, you’re essentially creating a living sponge for your soil. Unlike synthetic conditioners, it adapts to the needs of your garden, holding water when it’s scarce and releasing it when plants need it most. This adaptability is why many gardeners describe leaf mold as “insurance” against unpredictable weather.
It’s also worth noting that leaf mold is pH-neutral, making it safe for nearly all plants. Whether you’re growing vegetables, ornamentals, or even acid-loving shrubs, adding leaf mold will improve the soil without upsetting its balance. This is why many gardeners consider it essential to make leaf mold as part of their regular composting routine. It’s the quiet partner in soil care that ensures long-term fertility and resilience.
Another reason experienced gardeners whisper about leaf mold is its subtlety. Unlike compost, which delivers a visible nutrient boost, leaf mold works quietly in the background. You won’t see instant results, but over time, your soil becomes softer, richer, and more alive. That’s why many call it the “slow magic” of gardening.
Here’s a curiosity twist: in some old English estates, leaf mold was considered so valuable that gardeners would guard their leaf piles like treasure. They knew that whoever controlled the leaf mold controlled the fertility of the garden. That’s why learning how to make leaf mold was often passed down like a family secret, ensuring each new generation of gardeners could keep their soil fertile and productive.
Leaf Mold vs Compost: The Sibling Rivalry
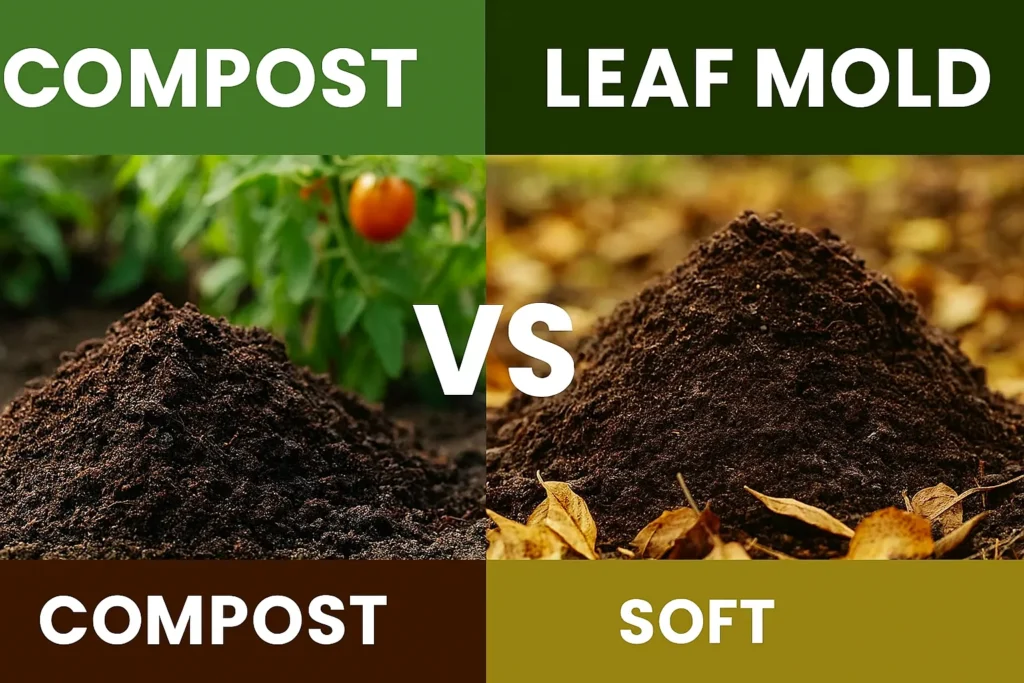
It’s easy to confuse leaf mold compost with traditional compost. But here’s the truth: they’re siblings, not twins.
- Compost is like a multivitamin — packed with nutrients, quick to make, and directly feeds plants. University of Minnesota Extension – Composting Basics.
- Leaf mold is like yoga for your soil — it doesn’t feed plants directly, but it makes the soil flexible, breathable, and resilient.
The twist? When you combine them, you get a powerhouse: compost provides nutrients, while leaf mold creates the perfect environment for roots to absorb them.
This is why many gardeners set aside a dedicated space to make leaf mold alongside their compost bins. By managing both processes, you ensure that your soil receives not only the nutrients it craves but also the structure it needs to thrive. It’s a partnership that mirrors the natural balance found in forests.
Interestingly, while composting is often seen as the “active” process, leaf mold is more passive — yet equally powerful. You don’t need to turn piles constantly or monitor temperatures. Once you set it up, fungi quietly do the work, and the results speak for themselves.
This is where the wisdom of balance comes in. If compost is the sprint, leaf mold is the marathon. Compost gives you quick wins, while leaf mold builds long-term resilience. Together, they form a cycle that mirrors nature itself — fast bursts of energy paired with steady, enduring support.
Twist: Think of it like cooking. Compost is the spice that adds flavor right away, while leaf mold is the slow-simmered stock that deepens every dish. Both are essential, but it’s the stock that makes the meal unforgettable. That’s why experienced gardeners always take time to make leaf mold, knowing it provides the depth and richness that keeps their soil thriving year after year.
Why Traditional Leaf Mold Takes Forever
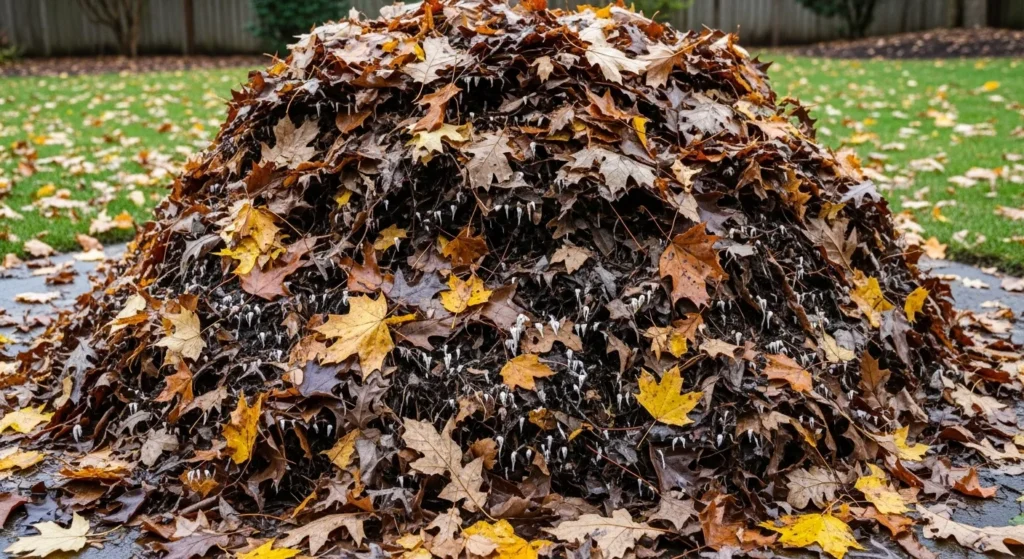
The classic advice is simple: pile up leaves, keep them damp, and wait 12 months. But here’s why it drags on:
- Leaves are high in lignin, a tough compound that fungi break down slowly.
- Piles compact, suffocating the fungi.
- Without nitrogen, decomposition crawls.
That’s why most gardeners give up. But with a few tweaks — shredding, aeration, and nitrogen boosts — you can make leaf mold quickly and have it ready by spring.
If you’ve ever tried to make leaf mold the old-fashioned way, you know how discouraging it can be to see little progress after months of waiting. The fast method solves this by giving fungi the perfect conditions to thrive, so you see visible changes within weeks. That sense of progress keeps you motivated to continue.
Another overlooked factor is leaf diversity. Mixing fast-decomposing leaves like birch with slower ones like oak creates a balanced texture in the final product. This blend ensures your leaf mold is both crumbly and long-lasting, making it more effective as a soil conditioner.
Another hidden factor is airflow. Traditional heaps often suffocate under their own weight, leaving the fungi gasping for oxygen. By giving them space to breathe, you’re essentially turbocharging the process. It’s like opening a window in a stuffy room — suddenly, everything comes alive.
Twist: Some gardeners even experiment with layering leaves with straw or shredded cardboard to create tiny air pockets. It’s a small adjustment, but it can shave weeks off the time it takes to make leaf mold.
The Rapid 6–8 Week Method (Step-by-Step)
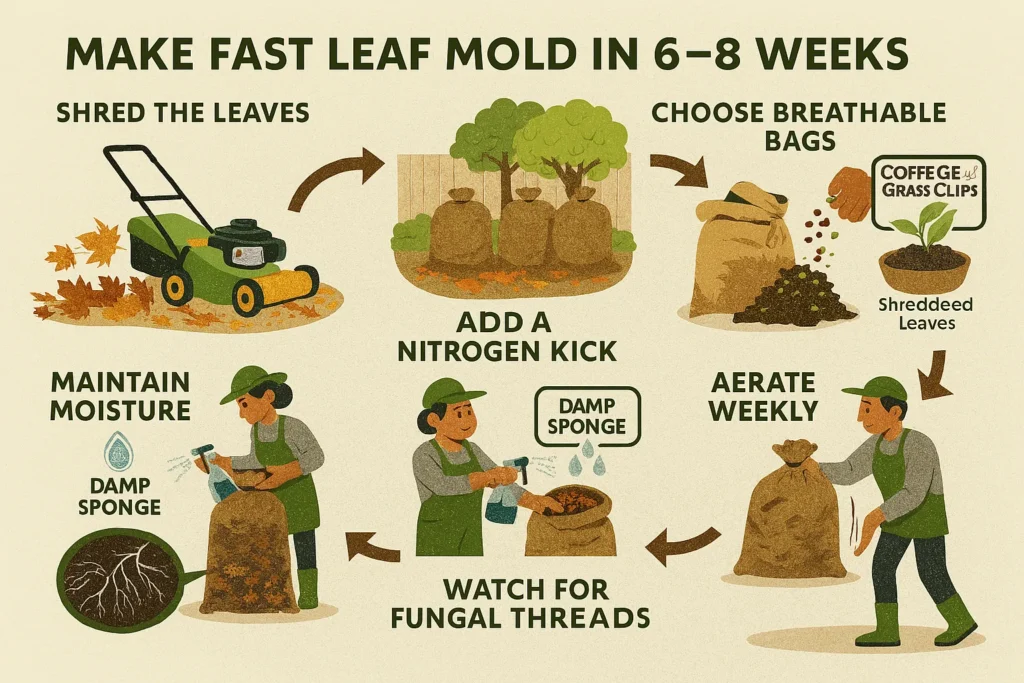
Here’s where the magic happens. This fast leaf mold method is designed for speed without sacrificing quality.
Step 1: Shred the Leaves
Whole leaves are like leather jackets for fungi — tough to break down. Shredding increases surface area and speeds decomposition by 3–4x.
- Use a mower, string trimmer, or even scissors for small batches.
- Bonus twist: Mix different leaf types. Maple and birch break down fast, while oak and beech are slower. The blend balances speed and texture.
Step 2: Choose Breathable Bags
Forget the giant leaf pile. Instead, use mesh bags, burlap sacks, or perforated plastic bags.
- Fill only ¾ full to allow shaking and airflow.
- Place bags in a shady, sheltered spot — fungi thrive in cool, moist conditions.
- Twist: Try a “leaf mold station” — line up 3–4 bags and rotate them weekly like a mini production line.
Step 3: Add a Nitrogen Kick
Leaves alone are carbon-heavy. To speed things up:
- Add coffee grounds, grass clippings, or kitchen scraps.
- Sprinkle in a scoop of finished compost or forest soil to inoculate with fungi.
- Twist: Some gardeners add a splash of diluted beer or molasses — fungi love sugars, and it can jumpstart activity.
Step 4: Maintain Moisture
Moisture is the secret ingredient.
- Aim for the “damp sponge” feel.
- Mist weekly if dry.
- Too wet? Add more shredded leaves.
- Twist: Insert a bamboo skewer into the bag. If it comes out dry, mist. If it drips, add dry leaves.
Step 5: Aerate Weekly
Shake or turn the bags once a week. This prevents compaction and keeps oxygen flowing.
- Twist: Treat it like a workout — “Shake the bag, grow the soil.” It’s oddly satisfying.
Step 6: Watch for Fungal Threads
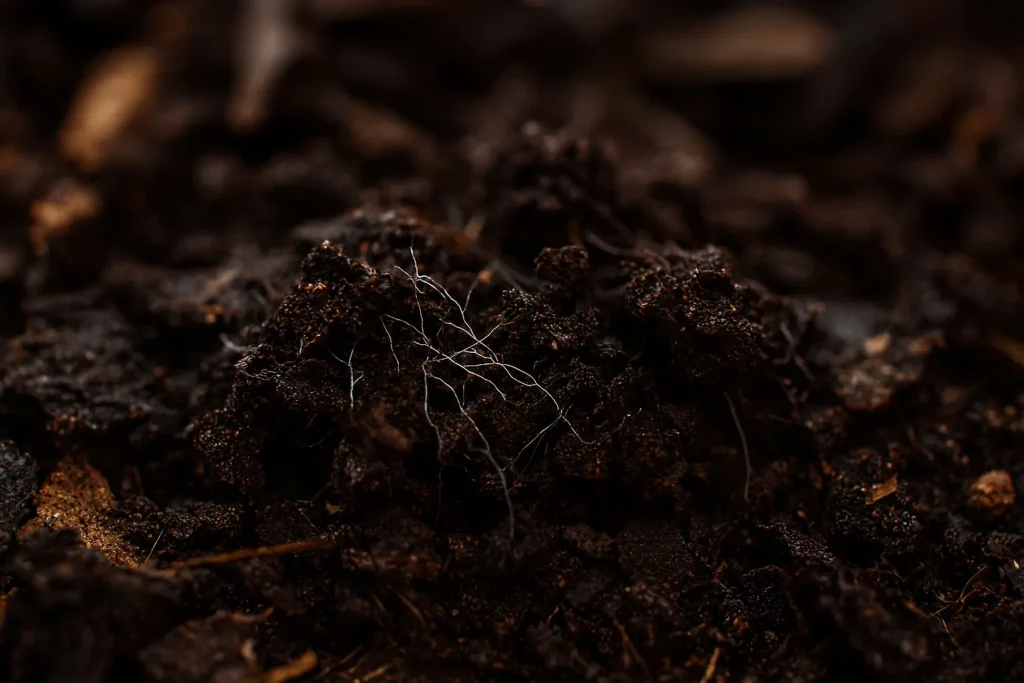
Within 2–3 weeks, you’ll see white fungal mats threading through the leaves. This is the sign of success.
- By week 6–8, the leaves should be dark, crumbly, and earthy-smelling.
- Twist: The first time you open a bag and see that forest-floor aroma, you’ll realize you’ve hacked nature’s timeline.
Once you’ve learned how to make leaf mold this way, it becomes one of the most rewarding seasonal projects. Unlike composting, which requires careful balancing, this method is simple and forgiving. As long as you keep the leaves moist and aerated, the fungi will reward you with a rich, earthy product.
The beauty of this system is its scalability. A single bag can supply enough leaf mold for container plants, while a row of bags can provide enough to condition entire garden beds. It’s a flexible approach that adapts to your gardening ambitions.
The real beauty of this method is that it doesn’t demand perfection. Even if you forget to shake the bags one week or add a little too much water, the fungi are forgiving. They’ll keep working, adjusting, and eventually delivering that dark, crumbly gold.
Twist: The first time you open a bag and see the transformation, it feels almost alchemical — as if you’ve turned autumn’s decay into spring’s promise. That moment alone is enough to make many gardeners lifelong fans of leaf mold. And once you realize how simple it is to make leaf mold with this forgiving process, it quickly becomes a trusted seasonal habit that rewards you year after year.
Troubleshooting: When Things Go Wrong

- Smelly/anaerobic: Too wet → add dry shredded leaves.
- Dry and crumbly: Mist with water.
- Slow breakdown: Add more nitrogen or shred finer.
- Mold concerns: White fungal growth is beneficial, not harmful.
Twist: If you see mushrooms sprouting, celebrate — it means your fungi are thriving.
If your attempt to make leaf mold seems slow, don’t panic. Unlike compost, which can fail if the balance is off, leaf mold almost always succeeds eventually. The key is patience and small adjustments — a little more moisture here, a bit more airflow there.
Another tip is to experiment with different storage methods. Some gardeners prefer mesh bags, while others use simple wire cages. Both work, but testing a few options will help you discover which method produces the fastest results in your climate.
One overlooked trick is to check the smell. A healthy batch of leaf mold smells earthy and fresh, like a forest floor after rain. If it smells sour or rotten, that’s your cue to adjust moisture or airflow. Trust your nose — it’s one of the best tools you have.
Some gardeners even keep a “test jar” — a small glass jar filled with leaves from their batch. By opening it weekly, they can track progress without disturbing the main pile. It’s a simple hack that keeps curiosity alive while ensuring success. And by using such small checks, you not only learn how to make leaf mold more effectively but also gain confidence that your main batch is on the right track.
Using Leaf Mold in the Garden
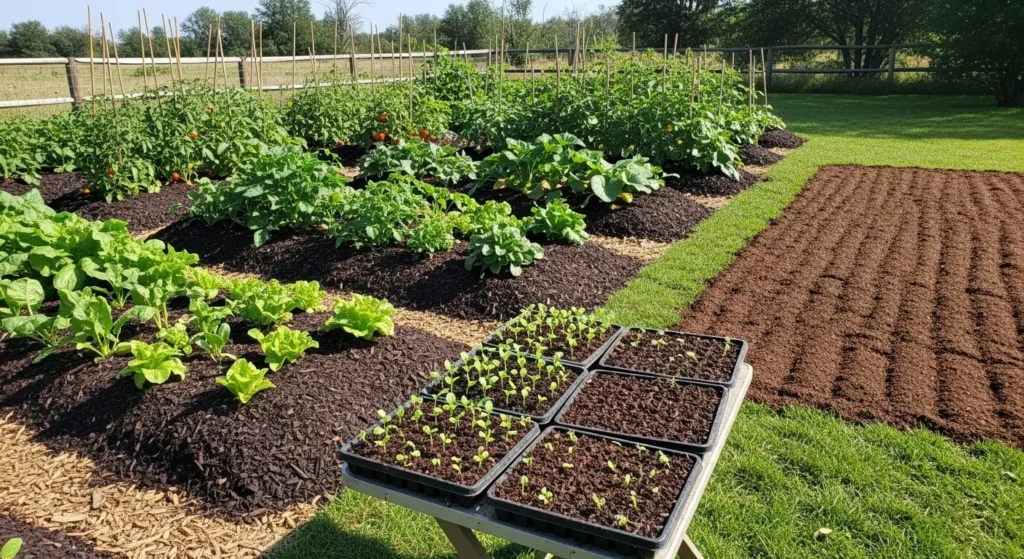
Here’s where the payoff comes. Leaf mold compost isn’t just one thing — it’s versatile.
As Mulch
Spread 2–3 cm around perennials, vegetables, and shrubs. It suppresses weeds and conserves moisture.
In Seed-Starting Mixes
Mix 1 part leaf mold with 1 part compost and 1 part sand/perlite. Creates a light, moisture-retentive medium.
As a Soil Conditioner
Work into clay soils to improve drainage. Add to sandy soils to boost water retention.
For Lawns
Sift and spread thinly as a top dressing. Improves turf health and resilience.
Twist: Try a “leaf mold tea” — steep a handful in water for 24 hours and use as a soil drench. It’s not fertilizer, but it boosts microbial life.
When you make leaf mold part of your annual routine, you’re building a long-term foundation for soil health. Each batch adds more organic matter, more fungal life, and more resilience to your garden. Over time, you’ll notice that your soil requires less watering, fewer amendments, and produces healthier plants.
You can also use leaf mold creatively in container gardening. Mixing it into potting soil improves drainage while keeping the medium light and airy. This is especially beneficial for seedlings and delicate plants that need consistent moisture without becoming waterlogged.
Another clever use is as a base for homemade potting mixes. By blending leaf mold with compost and sand, you can create a mix that rivals commercial products — at a fraction of the cost. It’s a sustainable, DIY approach that puts you in control of what goes into your soil.
Twist: Some gardeners even use leaf mold as a “healing bed” for stressed or transplanted plants. Its gentle texture and moisture-holding ability help roots recover faster, reducing shock and encouraging new growth. That’s why many experienced growers make leaf mold every season, ensuring they always have this versatile material on hand for mixes, mulches, and plant recovery.
Conclusion
Learning how to make leaf mold is more than just a seasonal project — it’s a way of working with nature instead of against it. By turning autumn’s fallen leaves into a rich, fungal-based soil conditioner, you’re closing the loop in your garden, recycling what would otherwise be waste into something that improves your soil for years to come. Unlike compost, which feeds plants directly, leaf mold strengthens the very foundation they grow in, ensuring healthier roots, better water retention, and a thriving ecosystem beneath the surface.
The best part is that this process is simple, low-cost, and accessible to every gardener. Whether you’re working with a balcony container or a sprawling backyard, you can make leaf mold quickly using the fast 6–8 week method. Each bag you prepare in autumn becomes a promise of healthier soil and stronger plants in spring. Over time, this small habit builds into a powerful tradition — one that connects you to the natural cycles of the seasons and rewards you with a garden that feels more alive each year.
So the next time you see a pile of fallen leaves, don’t think of them as a chore to be cleared away. Think of them as the raw material for one of the most valuable soil conditioners you can create. Gather them, shred them, bag them, and let the fungi do their quiet work. In just a few weeks, you’ll open those bags to find not waste, but wealth — the kind of wealth that only a gardener knows: dark, crumbly, life-giving leaf mold. The more you practice this method, the more it becomes second nature. Each autumn, you’ll find yourself scanning the ground for leaves not as litter, but as opportunity. And each spring, your garden will thank you with stronger plants, healthier soil, and fewer problems to solve.
Twist: The secret isn’t just that you can make leaf mold in 6–8 weeks. The real secret is how it changes the way you see your garden — not as a place of endless chores, but as a living system where even decay has purpose. That shift in perspective is what makes this guide more than a method; it’s a mindset.
Ready to transform your garden this season? Don’t let those autumn leaves go to waste — gather them, shred them, and start your first batch today. Once you see how easy it is to make leaf mold in just 6–8 weeks, you’ll never look at fallen leaves the same way again. Share your results, experiment with different methods, and watch your soil — and your confidence as a gardener — grow richer every year.
❓ Frequently Asked Questions (FAQ) About How to Make Leaf Mold
Q1: How long does it really take to make leaf mold?
With the fast method, you can make leaf mold in as little as 6–8 weeks. Traditional piles may take 6–12 months, but shredding leaves, adding nitrogen, and using breathable bags speed up the process dramatically.
Q2: Do I need special equipment to make leaf mold?
No. To make leaf mold, all you need are fallen leaves, a way to shred them (like a mower or trimmer), and breathable bags or a simple wire cage. Everything else is optional.
Q3: Can I make leaf mold without shredding the leaves?
Yes, but it will take much longer. Shredding increases surface area and helps fungi break down the leaves faster. If you want to make leaf mold quickly, shredding is highly recommended.
Q4: Is leaf mold the same as compost?
Not exactly. Compost is nutrient-rich and bacteria-driven, while leaf mold is fungal-driven and improves soil structure. Many gardeners make leaf mold alongside compost to get the best of both worlds.
Q5: Can I make leaf mold indoors or in small spaces?
Absolutely. You can make leaf mold in mesh bags, bins, or even buckets on a balcony or patio. As long as there’s airflow and moisture, the process works in small spaces too.
Q6: Is leaf mold safe to use on vegetables?
Yes. When you make leaf mold properly, it’s safe and beneficial for vegetable gardens. It improves soil texture, water retention, and microbial life, creating healthier growing conditions.
Q7: What types of leaves are best to make leaf mold?
Soft leaves like birch, maple, and ash break down quickly. Tougher leaves like oak or beech take longer but add structure. Mixing varieties is the best way to make leaf mold with a balanced texture.
Q8: How do I know when my leaf mold is ready?
When the leaves are dark, crumbly, and smell earthy — like a forest floor — your batch is finished. That’s the sign you’ve successfully learned how to make leaf mold.

")
")

21 Comments on “How to Make Leaf Mold in Just 6–8 Weeks (Fast Method for Autumn Leaves)”