
Table of Contents
Table of Contents
Introduction: What Raised Garden Beds Are & Why They’re Perfect for Beginners
If you’ve ever wanted to grow your own fresh vegetables, herbs, or flowers but weren’t sure where to begin, a raised garden bed might just be your perfect starting point. A raised garden bed is simply a garden box or enclosed area filled with soil that sits above the ground. Instead of digging directly into the ground. Instead of digging directly into your yard’s soil, you’re building your own mini-plot of land that you control from the ground up.
For beginner gardeners, this is a dream come true. You don’t need to worry about rocky soil, weeds taking over, or the back-breaking labor of digging deep into the earth. Raised garden beds let you skip straight to the fun part: planting and growing (For more inspiration on resilient planting, see our fast-growing winter cover crops guide). They’re neat, manageable, and flexible enough to fit almost any backyard or patio space.
Whether you’re a homeowner with a large yard, someone with a small patch of lawn, or even a DIY enthusiast who enjoys weekend projects, raised beds offer a friendly entry point into gardening. Let’s explore why they’re such a game-changer and how you can build one yourself.
Benefits of Raised Garden Beds

Before we dive into the “how,” it’s worth knowing the “why.” Raised garden beds come with several advantages that make them especially appealing for beginners.
1. Better Soil Control
You’re no longer at the mercy of your yard’s existing soil. Whether your ground is too sandy, too clay-heavy, or riddled with weeds, a raised bed lets you create your own nutrient-rich mix. This means your plants get the best possible start.
2. Easier Maintenance
No more endless weeding or backaches from stooping down to ground level. Raised beds are tidier, and because they’re elevated, you can tend to them with less bending (For additional ergonomic gardening hacks, check our low-maintenance indoor gardening guide). Some gardeners even build waist-high beds for ultimate comfort.
3. Higher Yields in Small Spaces
Raised beds are more productive per square foot than traditional in-ground gardens. The loose, fertile soil encourages healthy root growth, which leads to healthier plants and bigger harvests.
4. Accessibility
For children, older adults, or anyone with mobility issues, raised beds make gardening possible and enjoyable. You can design the height and width to match your needs.
5. Extended Growing Season
Because raised beds warm up faster in the spring and drain better after rain, you can start planting earlier and keep your garden thriving longer.
Planning Your Raised Garden Bed
Jumping right into construction sounds fun, but a little planning saves a lot of headaches. Here’s what to consider before you start building:
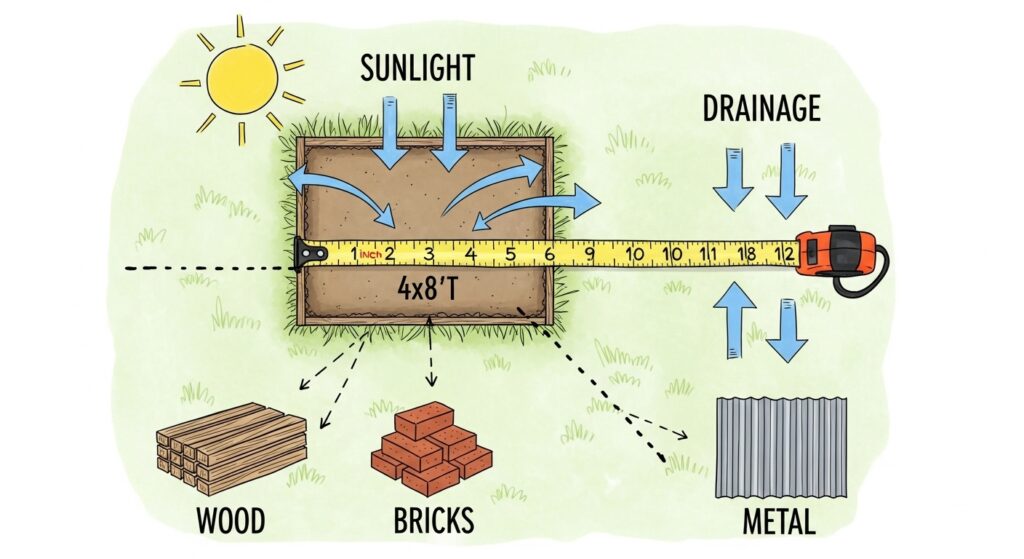
Location, Location, Location
Plants need plenty of sunlight—at least 6–8 hours per day for most vegetables. Choose a spot in your yard that gets consistent sun. Avoid areas shaded by large trees or fences.
Size Matters
A common beginner mistake is going too big too soon. Start small with a 4×4-foot or 4×8-foot bed (For more design inspiration, explore our contemporary small garden ideas). This size is large enough to grow a nice variety of crops, but still easy to reach from all sides without stepping into the bed (which compacts the soil).
Depth of the Bed
For most vegetables, a depth of 10–12 inches is sufficient. If you’re planting root vegetables like carrots or potatoes, aim for 18 inches.
Drainage Considerations
Raised beds should allow excess water to drain. Avoid placing them in low-lying spots where water pools after rain.
Choosing Materials
Think about durability, budget, and aesthetics. Wood is the classic choice, but bricks, metal, or recycled containers also work well.
Best Materials for Beginners
When it comes to building your raised bed, the materials you choose make a big difference. Let’s look at some popular beginner-friendly options:
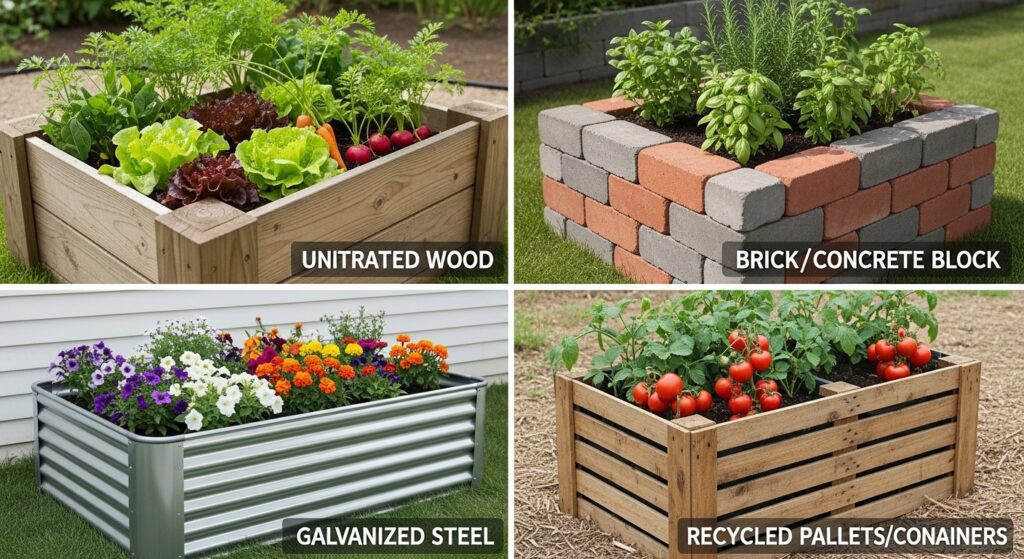
Untreated Wood
- Pros: Affordable, easy to cut and assemble, looks natural.
- Cons: Will rot over time (typically 5–10 years depending on climate).
- Tip: Cedar or redwood lasts longer than pine. Avoid pressure-treated lumber if you’re growing food.
👉 For safe material choices, see our 7 best safe materials for raised beds guide.
Bricks or Concrete Blocks
- Pros: Extremely durable, weatherproof, no risk of rotting.
- Cons: Heavier to move and more labor-intensive to set up.
- Tip: Great if you want a permanent bed with a classic look.
Metal (Galvanized Steel or Corrugated Panels)
- Pros: Modern look, long-lasting, resists pests and rot.
- Cons: Can heat up quickly in hot climates, which may stress plants.
- Tip: Line the inside with landscape fabric to reduce heat transfer.
Recycled Containers & Pallets
- Pros: Low-cost or free, eco-friendly, creative.
- Cons: May not last as long or provide as much growing space.
- Tip: Always check that recycled materials are safe for gardening (no harmful chemicals or paints).
Step-by-Step DIY Building Guide
Ready to get your hands dirty? Here’s a beginner-friendly plan to build your very first raised garden bed.
Tools & Supplies Checklist
- Measuring tape
- Saw (if cutting wood)
- Drill or screwdriver
- Wood screws or nails
- Level
- Gardening gloves
- Landscape fabric (optional, for weed control)
- Soil, compost, and mulch
Step 1: Build the Frame
- Measure and cut four wooden boards to your desired size (example: two boards at 8 feet and two at 4 feet for a 4×8-foot bed).
- Arrange them into a rectangle on level ground.
- Secure the corners with screws or nails. For extra stability, add corner posts on the inside.
- Check with a level to ensure the frame sits evenly on the ground.
👉 For more DIY construction ideas, see our DIY cold frame budget plans.
Step 2: Prepare the Base
- If you’re worried about weeds, lay down a sheet of cardboard or landscape fabric at the bottom.
- If you’re placing your bed on concrete or a patio, ensure there are drainage holes or gaps for excess water.
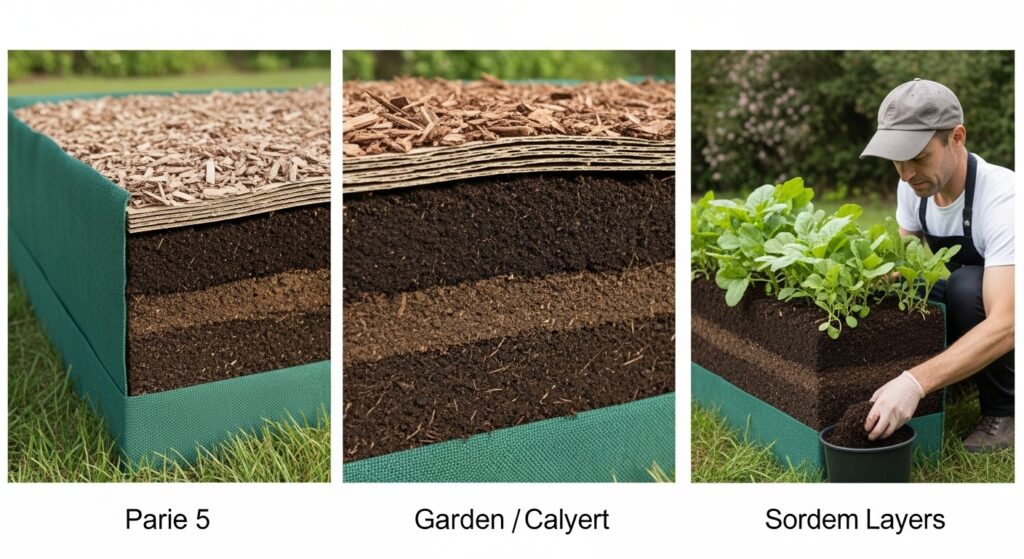
Step 3: Fill with Soil Mix
A healthy soil mix is the heart of your raised bed. Aim for a blend like this:
- 50% topsoil (or garden soil)
- 30% compost (homemade or store-bought)
- 20% other organic matter (peat moss, coco coir, or aged manure)
Layer these in and mix well. You want a loose, crumbly texture that drains well but holds moisture.
Step 4: Plant Your Crops
- Start with easy-to-grow plants like lettuce, radishes, basil, cherry tomatoes, or marigolds.
- Space plants according to their needs—crowding leads to poor growth.
- Water thoroughly after planting.
Budget-Friendly DIY Ideas
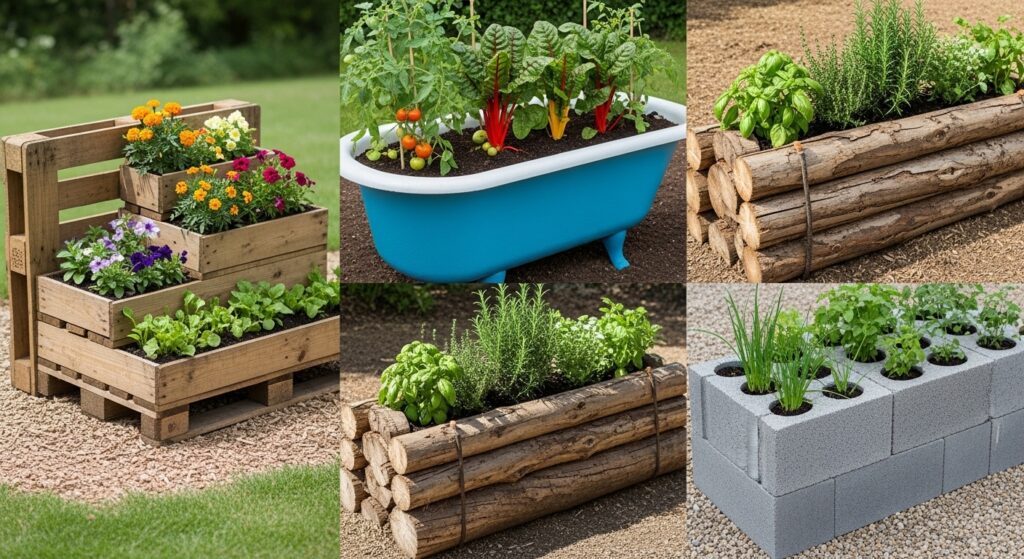
Not everyone wants to spend a fortune on their first garden project. The good news? Raised beds don’t have to be expensive.
- Pallet Wood Beds: Disassemble free shipping pallets and repurpose the planks into a small raised bed.
- Recycled Bathtubs or Troughs: Old containers make quirky, functional garden beds. Drill drainage holes if needed.
- Stacked Logs: If you have fallen trees or firewood, stack logs into a rustic raised bed frame (👉 For additional recycling hacks, check our how I turned trash into garden treasure guide).
- Cinder Blocks: Line up blocks into a rectangle and even plant herbs inside the holes.
What to Grow in Your First Raised Bed

Keep it simple and start with plants that practically grow themselves. Beginner favorites include:
Easy Vegetables
- Lettuce & Leafy Greens: Fast-growing, continuous harvest.
- Radishes: Ready in just 3–4 weeks.
- Tomatoes: Cherry varieties are less fussy (For tomato-growing tips, explore our grow tomatoes in pots without soil guide).
- Green Beans: Hardy and productive.
- Carrots: Just make sure your bed is deep enough.
Herbs
- Basil: Loves the sun and adds flavor to countless dishes.
- Mint: Thrives almost too well (best in containers or confined spaces).
- Parsley: Hardy and useful in the kitchen.
Flowers
- Marigolds: Repel pests and brighten the bed.
- Sunflowers: Easy, cheerful, and kid-friendly.
Maintenance Tips for Healthy Beds
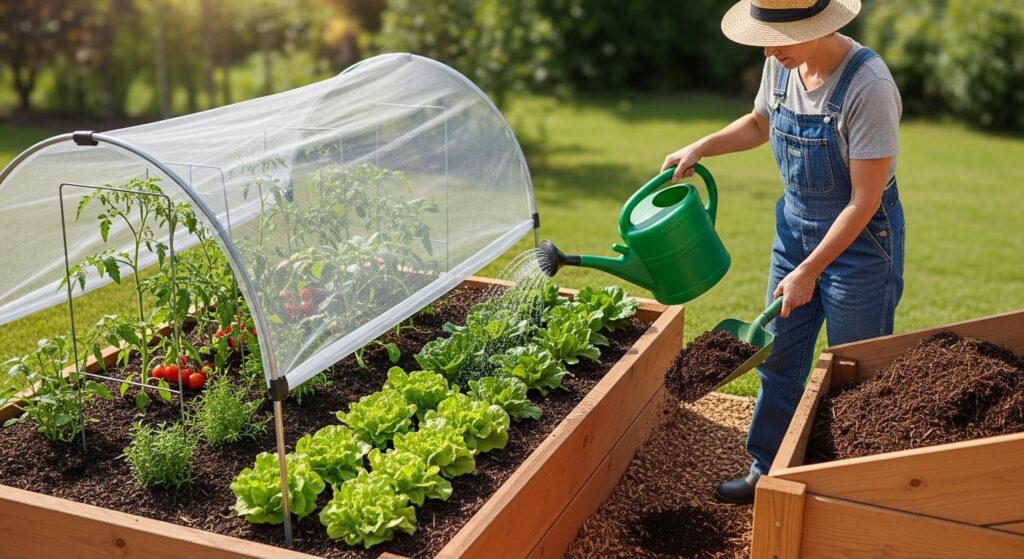
Raised beds are lower maintenance, but they still need some care.
- Watering: Raised beds dry out faster than ground soil. Water deeply 2–3 times per week, more often in hot weather.
- Mulching: Add a 2-inch layer of straw, leaves, or wood chips on top of the soil to retain moisture and block weeds (For compost-based soil enrichment, see our ultimate guide to making compost at home).
- Fertilizing: Refresh the soil each season with compost or organic fertilizer.
- Pest Prevention: Use row covers, companion planting (like basil near tomatoes), and regular inspection to keep pests under control.
Common Mistakes Beginners Should Avoid

Even the best DIY projects come with a learning curve. Here are pitfalls to dodge:
- Using the wrong soil: Don’t fill your bed with dirt from the yard. It’s too compact and may contain weeds.
- Ignoring drainage: Without good drainage, plants may drown. Always choose a well-drained location and soil mix (For frost safety tips, check our frost protection for plants DIY guide).
- Overcrowding plants: Each plant needs space to grow. Check spacing guidelines before planting.
- Going too big too fast: Start small. You can always add more beds later.
- Forgetting about sunlight: No amount of good soil can replace the 6–8 hours of daily sun most vegetables need.
Conclusion: Your Raised Bed Gardening Journey Begins
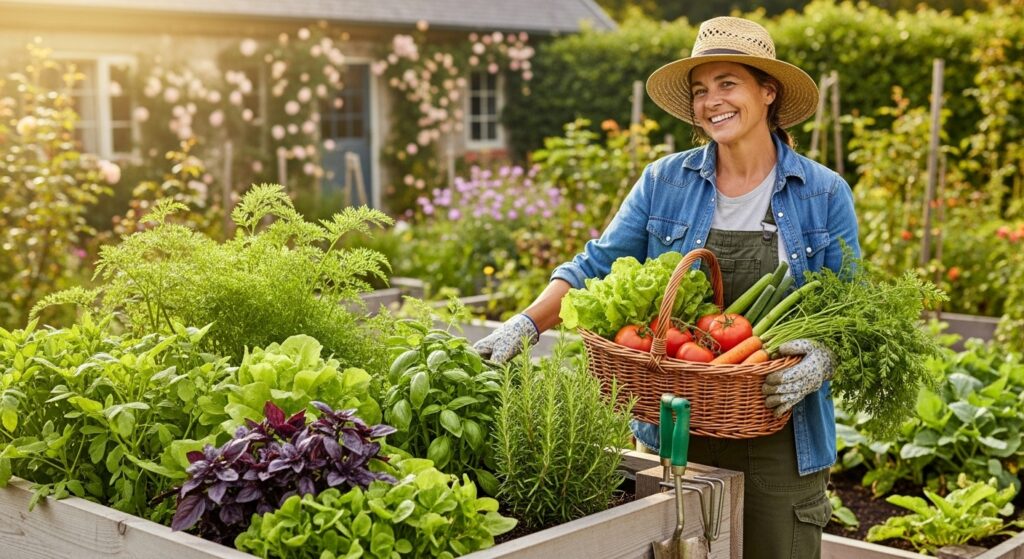
Building your own raised garden bed is more than just a DIY project—it’s an invitation to connect with nature, enjoy fresh food, and create something beautiful with your own two hands. With a simple frame, good soil, and a few beginner-friendly plants, you’ll be harvesting lettuce, tomatoes, and herbs in no time.
Don’t overthink it. Start small, use what you have, and let your garden grow along with your confidence. Each season, you’ll learn something new, and before long, you’ll be overflowing with fresh produce and new ideas for expansion.
So, roll up your sleeves, grab some wood or recycled materials, and take the first step. Your DIY raised garden bed is waiting—and so is the joy of homegrown food.
For more companion planting strategies, see our companion planting month-by-month guide.
Happy gardening!
🌱 FAQ: Raised Garden Beds for Beginners
1. What are Raised Garden Beds?
Raised Garden Beds are enclosed boxes or frames filled with soil that sit above ground level. They allow you to control soil quality, drainage, and layout, making gardening easier and more productive.
2. Why are Raised Garden Beds good for beginners?
They eliminate common challenges such as poor soil, weeds, and excessive digging. Beginners can focus on planting and growing without worrying about back-breaking labor or rocky ground.
3. What are the benefits of Raised Garden Beds?
a. Better soil control: You create your own nutrient-rich mix.
b. Easier maintenance: Less bending and fewer weeds.
c. Higher yields: Loose soil promotes healthy roots and bigger harvests.
d. Accessibility: The adjustable height makes gardening easier for kids, seniors, and individuals with mobility issues.
e. Extended growing season: Beds warm faster in spring and drain better after rain.
4. What size should Raised Garden Beds be?
A 4×4-foot or 4×8-foot bed is ideal for beginners. This size is manageable, provides variety, and allows easy access from all sides without stepping into the bed.
5. How deep should Raised Garden Beds be?
* 10–12 inches: Suitable for most vegetables.
* 18 inches: Recommended for root crops like carrots or potatoes.
6. What materials are best for building Raised Garden Beds?
– Untreated wood: Affordable and natural, though it rots over time.
– Bricks or concrete blocks: Durable and weatherproof.
– Metal panels: Modern look, long-lasting, but can heat up in hot climates.
– Recycled containers or pallets: Eco-friendly and budget-friendly options.
7. What soil mix should I use in Raised Garden Beds?
A balanced mix works best:
– 50% topsoil
– 30% compost
– 20% organic matter (peat moss, coco coir, or aged manure)
8. What plants grow well in Raised Garden Beds?
– Easy vegetables: Lettuce, radishes, cherry tomatoes, beans, carrots.
– Herbs: Basil, mint, parsley.
– Flowers: Marigolds and sunflowers add beauty and repel pests.
9. How do I maintain Raised Garden Beds?
– Watering: 2–3 times per week, more in hot weather.
– Mulching: Add straw, leaves, or wood chips to retain moisture.
– Fertilizing: Refresh soil with compost each season.
– Pest prevention: Use row covers, companion planting, and regular checks.
10. What mistakes should beginners avoid with Raised Garden Beds?
– Using yard dirt instead of a proper soil mix.
– Ignoring drainage needs.
– Overcrowding plants.
– Building beds too large, too soon.
– Forgetting to choose a sunny location.
")
")

7 Comments on “Beginner’s Guide to DIY Raised Garden Beds”